Replacing a faulty crankshaft sensor improves the performance of your vehicle, but you should know what to do after the replacement.
There are some vital steps you should take after replacing the sensor of your vehicle need to run smoothly and avoid any further issues.
In this blog post, we will find out the key steps your need to take after replacing the crankshaft sensor.
What to do after replacing the crankshaft sensor
After replacing the crankshaft sensor, follow a few steps to know your vehicle is running smoothly.

Clear any error codes:
Use an OBD-II scanner to clear any error codes that may have been triggered by the faulty crankshaft sensor.
This will ensure your vehicle’s computer is aware of the new sensor and will accurately monitor its performance.
Test drive your vehicle:
Take your car for a test drive to see if the replacement has resolved any issues that led to the sensor replacement in the first place.
Drive on different types of roads and at different speeds to get a good performance of your vehicle.
Monitor your vehicle’s performance:
Make sure to keep an eye on how your ride is performing for the next little while after replacing the crankshaft sensor.
Watch out for any changes in things like fuel economy, acceleration, or idle speed.
If anything seems off, maybe consider getting it looked at again to avoid any more issues.
Schedule a follow-up inspection:
If you’re noticing any problems with your riding, it might be time to get a follow-up check with a certified mechanic. They’ll be able to figure out the problems to fix them properly.
How to know if your crankshaft sensor needs replacing
By following the below steps, you can determine if your crankshaft sensor needs replacing and take the necessary steps to address any issues.
Check the check engine light:
Your vehicle’s check engine light is a sign of a faulty crankshaft sensor.
Use an OBD-II scanner to read the error codes and determine the crankshaft sensor’s issues.
Look for engine performance issues:
A faulty crankshaft sensor can cause engine performance issues such as misfires, rough idling, and stalling. If you experience any symptoms, it may need replacing.
Check for starting issues:
A faulty crankshaft sensor can also prevent your vehicle from starting or cause it to start intermittently.
If you have trouble starting your vehicle or it stalls shortly after starting, it could be due to a faulty sensor.
Inspect the sensor for damage:
If you suspect that the crankshaft sensor is faulty, visually inspect it for damage or wear.
Look for any cracks, corrosion, or other signs of damage.
Check the wiring:
The wiring that connects the sensor to the vehicle’s computer can also cause issues.
Check the wiring for any damage or wear and ensure that the connections are secure.
Test the sensor:
Use a multimeter to test the resistance of the sensor. Refer to your vehicle’s service manual for specific resistance values.
Outstanding resistance to the acceptable range needs to be replaced.
Steps for replacing the crankshaft sensor

Here are the steps for replacing the crankshaft sensor in your vehicle:
Gather the necessary tools:
Make sure you have all the necessary tools for the job, a socket wrench set, pliers, and a multimeter.
Check your vehicle’s service manual for any specific tools or parts.
Locate the sensor:
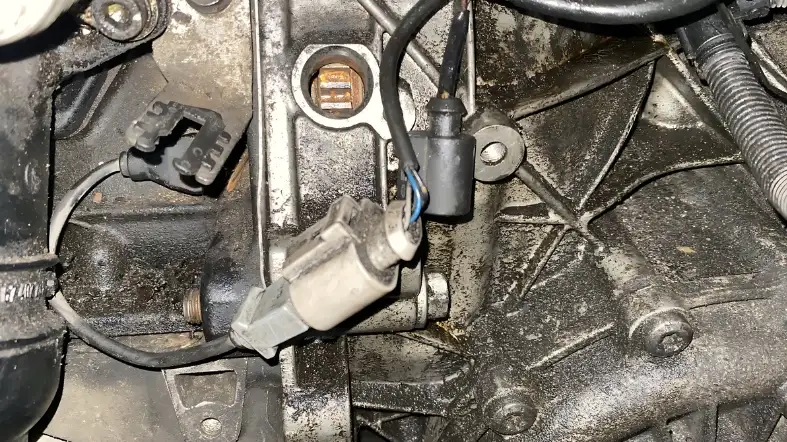
The crankshaft sensor is usually located near the crankshaft pulley or the flywheel.
Refer to your vehicle’s service manual for the exact location of the sensor.
Disconnect the battery:
Before starting any work on the sensor, disconnect the battery to avoid any electrical shock or damage. To do this, remove the negative terminal of the battery.
Remove the old sensor:
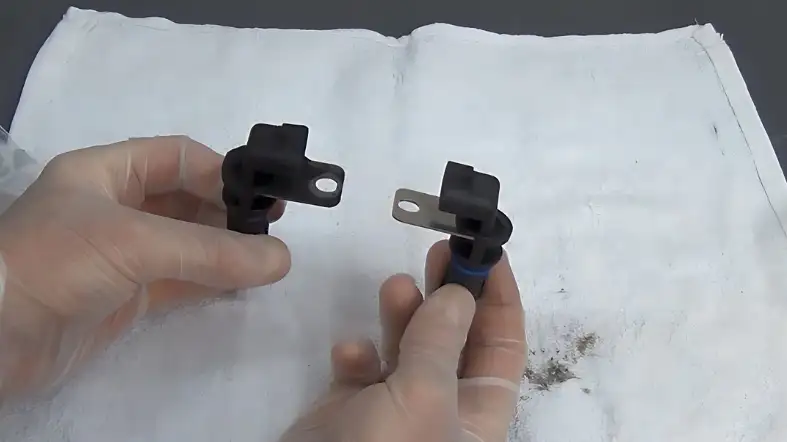
The old crankshaft sensor is usually held in place by bolts or screws.
Use the socket wrench set to remove the bolts and carefully remove the old sensor from its location.
Clean the area:
Use a clean rag to clean the area around the sensor. This will ensure the new sensor’s cleanliness and security.
Install the new sensor:
Take the new sensor and carefully install it in the same location. Use the socket wrench set to secure the new sensor in place with any bolts or screws.
Reconnect the battery:
Once the new sensor is securely in place, reconnect the battery. Reconnect the negative terminal of the battery and ensure that all connections are secure.
Test the new sensor:
Use a multimeter to test the resistance of the new sensor. Refer to your vehicle’s service manual for specific resistance values.
If the resistance is within the acceptable range, the new sensor is working properly.
Clear the error codes:
After replacing the crankshaft sensor, use an OBD-II scanner to clear any error codes that may have been triggered by the faulty sensor.
This will ensure that your vehicle’s computer is aware of the new sensor and will accurately monitor its performance.
Test drive your vehicle:
Take your vehicle for a test drive to ensure that the replacement has resolved any issues that led to the sensor replacement in the first place.
Drive on different types of roads and at different speeds to get a good vehicle performance.
Long-term maintenance tips

Here are some long-term maintenance tips to keep your crankshaft sensor smooth:
Regularly inspect and clean the sensor:
Regularly clean if it is necessary. Dirt, debris, and oil buildup can affect the sensor’s performance and engine issues.
Change the oil and oil filter regularly:
Regular oil changes are essential to keep your engine running smoothly.
Old or dirty oil can cause wear and tear on the engine, which can eventually lead to sensor issues.
Replace other sensors as needed:
The crankshaft sensor works in conjunction with other sensors in your vehicle. If any of these sensors malfunction, it can affect the performance of the crankshaft sensor and the engine.
Replace other sensors as needed to keep your engine running smoothly.
Address any engine issues immediately:
If you notice any engine issues, address them immediately. Ignoring engine problems can lead to more serious issues and more expensive repairs down the road.
Use high-quality parts:
Use high-quality parts that are recommended by your vehicle’s manufacturer.
Cheap or inferior parts can cause engine issues and affect the performance of the crankshaft sensor.
Follow the recommended maintenance schedule:
Follow the recommended maintenance schedule for your vehicle to check all components are working properly.
Regular maintenance can prevent sensor issues and prolong the life of your engine.
FAQs
Will Replacing The Crankshaft Sensor Fix All Engine Problems?
No, replacing the crankshaft sensor will only address issues related to the sensor itself.
If you have other engine problems, you may need to address those separately.
Do I Need To Clear Error Codes After Replacing The Crankshaft Sensor?
Yes, clear any error codes that can be triggered by the faulty sensor.
By clearing any error codes, your vehicle’s computer will be able to recognize the new crankshaft sensor and monitor its performance with accuracy.
How Do I Know If The New Crankshaft Sensor Is Working Properly?
You can use a multimeter to test the resistance of the new sensor. Refer to your vehicle’s service manual for specific resistance values.
If the resistance is within the acceptable range, the new sensor is working properly.
How Often Should I Inspect And Clean The Crankshaft Sensor?
It is recommended to inspect and clean the crankshaft sensor regularly, such as during routine maintenance intervals or whenever you notice engine performance issues.
Can A Faulty Crankshaft Sensor Cause My Engine To Stall?
Yes, a faulty crankshaft sensor can cause engine stalling or other performance issues.
Replacing the sensor can address these issues and restore proper engine function.
Final thoughts
Replacing the crankshaft sensor is an important task that can help ensure the proper function of your vehicle’s engine.
After replacing the sensor, follow the necessary steps, such as clearing error codes and testing the new sensor, to ensure that everything is working properly.
Long-term maintenance, such as regular sensor inspection and cleaning, can help prevent issues and prolong the life of your engine.
By following these tips and addressing any engine problems promptly, you can keep your vehicle running smoothly and avoid costly repairs in the future.
