Cam phasers are an essential part of an engine’s variable valve timing system, and they can experience wear and tear over time.
It’s important to check them regularly to ensure that they are functioning properly and prevent more significant engine problems down the line.
In this guide, we will provide a comprehensive overview of how to check cam phasers, including the tools needed, the steps involved in the inspection process, and tips for maintaining cam phasers to prevent issues.

Here is a checklist for checking cam phasers like a pro:
- Prepare your tools and the vehicle.
- Remove the valve cover and inspect the cam phasers for damage or wear.
- Connect a scan tool to the OBD system and monitor the cam phaser position readings.
- Start the engine and observe the cam phaser position readings.
- Accelerate and decelerate the engine while monitoring the phaser position readings.
- Look for discrepancies or inconsistent phaser readings that don’t match engine RPM.
- Check for any trouble codes related to cam phaser operation using the scan tool.
- Check for proper phaser oil control valve operation.
- Inspect camshaft timing marks and timing chain condition.
- Check for proper oil pressure and oil filter condition.
How To Check Cam Phasers? Detailed Guide
Here is the step-by-step guide to check cam phasers:
Prepare for Inspection
Before inspecting the cam phasers, you need to prepare your tools and the vehicle.
Park the vehicle on a level surface, turn off the engine, and open the hood. Locate the valve cover and gather the necessary tools, including a scan tool, sockets, and a wrench.
It’s important to wear safety gloves and goggles to protect yourself from hot engine components. Disconnect the battery ground cable before removing the valve cover.
Remove The Valve Cover And Inspect Cam Phasers
Remove the valve cover by loosening the bolts or nuts and securing it to the engine.
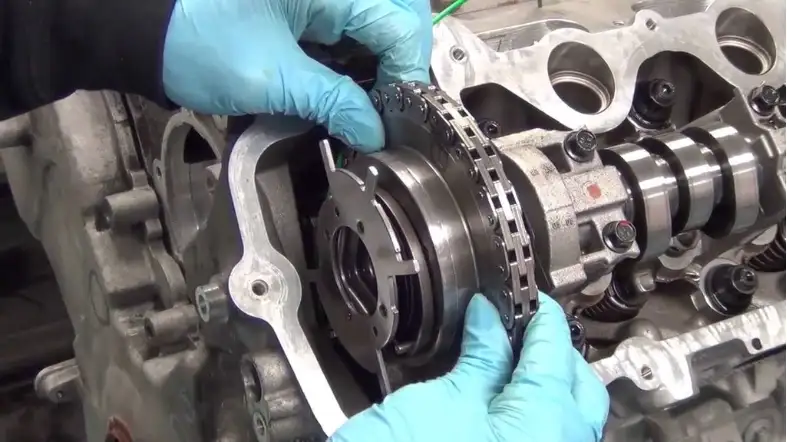
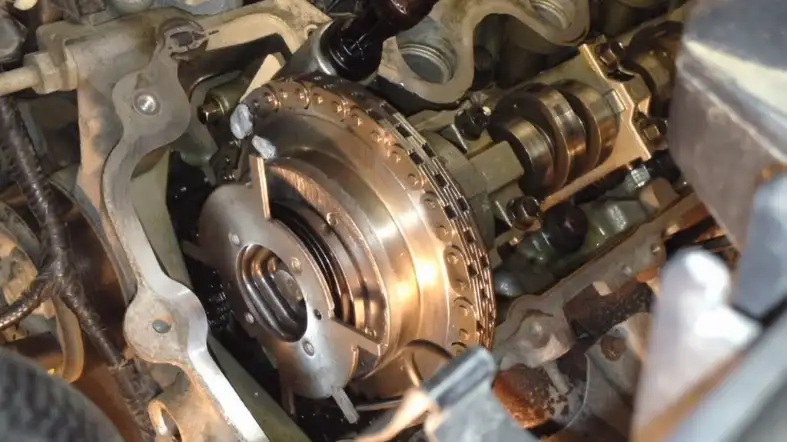
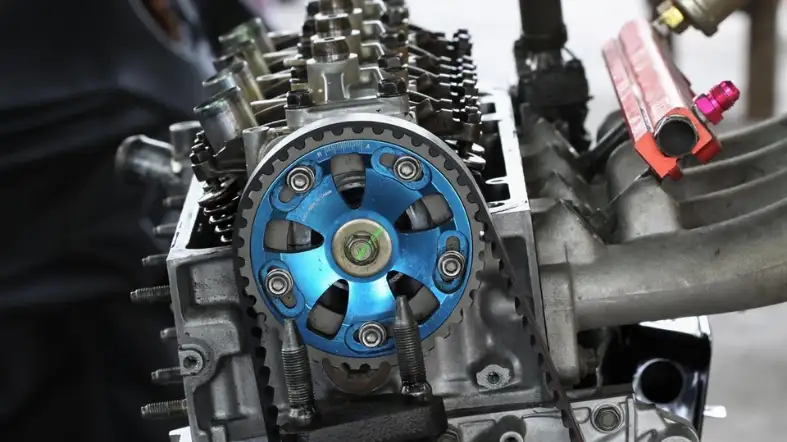
Once the valve cover is removed, inspect the cam phasers for any damage or wear.
Look for signs of scoring, scuffing, or excessive wear on the phaser’s teeth or housing.
Any damage or wear can cause timing issues and should be repaired or replaced.
Connect Scan Tool and Monitor Cam Phaser Position
Connect a scan tool to the on-board diagnostic (OBD) port and turn the ignition key to the “on” position without starting the engine.
Use the scan tool to monitor the cam phaser position readings. The scan tool should be able to read the cam phaser position in degrees.
Start the Engine and Observe Cam Phaser Position
Start the engine and observe the cam phaser position readings.
The position readings should match the engine’s RPM and remain stable when the engine is idling.
The position readings may fluctuate slightly during acceleration or deceleration, but they should return to their stable state once the engine reaches a steady speed.
Accelerate and Decelerate the Engine
Accelerate and decelerate the engine while monitoring the phaser position readings. The readings should change smoothly and consistently with the engine’s RPM.
Any discrepancies or inconsistent phaser readings that do not match the engine RPM may indicate a problem with the phasers.
Check for Trouble Codes
Use the scan tool to check for any trouble codes related to cam phaser operation.
Any trouble codes should be recorded and troubleshooting should be done using the manufacturer’s service manual.
Check for Proper Oil Control Valve Operation
Check the oil control valve operation by using the scan tool to activate it. Observe the cam phaser position readings as the valve operates.
The readings should change in response to the valve’s operation. If the readings do not change, there may be an issue with the oil control valve or the wiring to the valve.
Inspect Camshaft Timing Marks and Timing Chain Condition
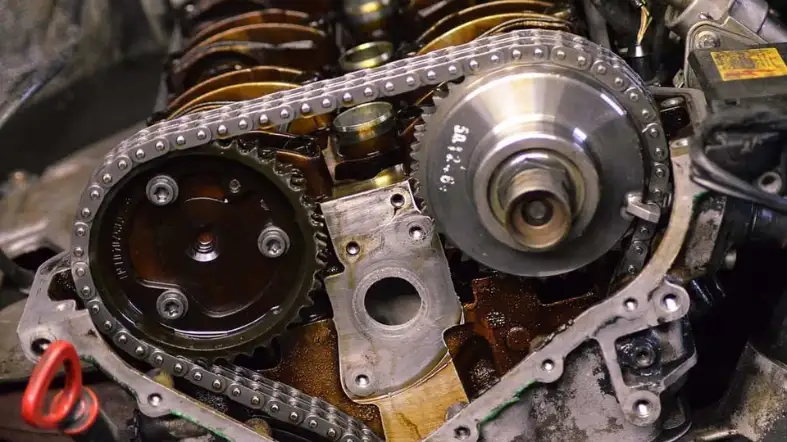
Inspect the camshaft timing marks and timing chain condition. Look for signs of wear or damage to the timing chain or the teeth on the camshaft sprocket.
Any damage or wear to the timing chain or sprocket teeth can cause timing issues and should be repaired or replaced.
Check for Proper Oil Pressure and Oil Filter Condition
Check the engine’s oil pressure using a mechanical gauge. The oil pressure should be within the manufacturer’s recommended range.
Check the oil filter for signs of contamination or blockage. If the oil pressure is low or the oil filter is contaminated, it can cause phaser issues.
If any issues are detected during the cam phaser inspection, it is recommended to have a professional mechanic diagnose and repair the problem.
Symptoms of Cam Phaser Failure

Cam phaser failure can cause a variety of symptoms, depending on the severity of the problem. Some common symptoms of cam phaser failure include
Rough idling:
A faulty cam phaser can cause the engine to idle roughly, which means that it may shake, vibrate, or make unusual noises.
This can make it difficult to keep the engine running smoothly, especially at low speeds.
Reduced power:
If the cam phaser is not working properly, it can affect the engine’s power output.
This can cause the engine to feel sluggish or have reduced acceleration, making it more difficult to get up to speed or pass other vehicles on the road.
Engine knocking or ticking:
A faulty cam phaser can cause the engine to make a knocking or ticking sound.
This can be caused by a damaged or worn camshaft or camshaft bearing, which can lead to further engine damage if not addressed promptly.
Check engine light:
A malfunctioning cam phaser can trigger the engine’s computer to turn on the check engine light.
This can be caused by a faulty sensor or a problem with the phaser itself, and it’s important to have the issue diagnosed by a professional mechanic as soon as possible.
Poor fuel economy:
If the cam phaser is not working correctly, it can cause the engine to consume more fuel than normal.
This can result in decreased fuel efficiency and higher fuel costs, as well as increased emissions from the vehicle.
This can cause damage to the engine and other components of the vehicle.
Tools Needed for Cam Phaser Check

Checking the cam phaser on an engine typically requires a few specialized tools to ensure the job is done correctly.
Here are some of the tools that are commonly used for a cam phaser check:
OBD-II scanner:
An OBD-II scanner is a diagnostic tool that reads codes and data from the engine control module (ECM) to identify issues with the engine.
It is used to check for any trouble codes related to the cam phaser or other components of the engine.
The scanner can also read live data from the engine to help identify any abnormalities or irregularities in the engine’s performance.
Timing light:
A timing light is used to measure the engine’s ignition timing, which is the point at which the spark plug fires in relation to the position of the pistons.
It is used to check the timing of the cam phaser to ensure that it is working correctly.
The timing light illuminates the timing marks on the engine and helps the mechanic identify the correct timing position of the engine.
Camshaft locking tool:
A camshaft locking tool is used to hold the camshaft in place during the removal and installation of the cam phaser.
This tool ensures that the camshaft stays in the correct position while the phaser is being serviced.
It prevents the camshaft from moving, which could damage the engine or the camshaft itself.
Dial indicator:
A dial indicator is a precision tool used to measure the movement of the camshaft during operation.
It is used to ensure that the cam phaser is properly aligned and functioning as it should.
The mechanic attaches the dial indicator to the engine block and measures the camshaft’s movement during engine operation.
Torque wrench:
A torque wrench is used to tighten the bolts and nuts to their recommended torque settings.
This ensures that the cam phaser and other components are tightened correctly and securely.
Over-tightening or under-tightening the bolts can cause damage to the engine, so using a torque wrench is critical to ensure that everything is tightened to the correct specifications.
Preventing cam phaser failures
Cam phaser failures can be prevented by following these maintenance and usage tips:
Regular oil changes:
Regular oil changes are essential to keep the engine lubricated and prevent damage to the cam phaser.
It’s important to follow the manufacturer’s recommended oil change intervals and use the recommended oil grade and viscosity.
This ensures that the engine is properly lubricated, reducing wear and tear on the cam phaser and other engine components.
Use high-quality oil:
Using high-quality oil that meets the manufacturer’s specifications is essential to prevent cam phaser failure.
High-quality oil contains additives that protect against wear, reduce deposits, and maintain the proper viscosity over time.
Using low-quality oil or oil that does not meet the specifications can cause damage to the cam phaser and other engine components.
Avoid short trips:
Short trips don’t allow the engine to warm up fully, which can lead to increased wear on the cam phaser and other engine components.
Try to avoid short trips whenever possible, or let the engine warm up before driving.
This allows the oil to reach the proper temperature and flow throughout the engine, reducing wear on the cam phaser.
Regular engine maintenance:
Regular engine maintenance, including checking and replacing worn or damaged parts, can prevent cam phaser failure.
This includes regular tune-ups, air filter changes, and fuel system cleanings.
Proper maintenance ensures that the engine is running at peak performance, reducing the risk of cam phaser failure.
Avoid harsh driving:
Harsh driving, such as sudden acceleration, hard braking, or driving on rough roads, can cause damage to the cam phaser and other engine components.
To prevent this, try to drive smoothly and avoid sudden stops or starts. This reduces the stress on the engine and reduces the risk of damage to the cam phaser.
Use high-quality parts:
Using high-quality replacement parts is essential to prevent cam phaser failure.
Make sure to use parts that meet the manufacturer’s specifications and are designed for your specific engine.
This ensures that the parts are of the highest quality and are designed to work properly with your engine, reducing the risk of failure.
Tips for maintaining cam phasers and preventing issues

To maintain cam phasers and prevent issues, consider the following tips:
Maintenance schedule:
Regular maintenance is essential to keep the engine and cam phasers in good condition.
Follow the manufacturer’s recommended maintenance schedule, which typically includes oil changes, filter replacements, and other engine checks.
Use high-quality oil:
High-quality oil with the right viscosity and additives can help maintain cam phaser performance and prolong its lifespan.
Check the owner’s manual or consult with a mechanic to find the best oil for your engine.
Check for leaks:
Oil leaks around the cam phasers can cause serious damage, including increased wear and tear and eventual failure.
Check for leaks regularly and have them repaired immediately.
Listen for unusual engine noises:
Any unusual sounds, such as ticking or knocking, could be a sign of cam phaser problems.
If you hear any unusual noises, have the engine checked by a mechanic.
Avoid extreme temperatures:
Extreme temperatures can cause cam phasers to fail.
Avoid prolonged exposure to high or low temperatures, and use appropriate cooling and heating systems.
Avoid short trips:
Short trips don’t allow the engine to warm up fully, which can lead to increased wear on the cam phasers and other engine components.
If possible, combine multiple short trips into one longer trip to allow the engine to warm up fully.
Drive smoothly:
Harsh driving, including sudden acceleration, hard braking, or driving on rough roads, can cause damage to the cam phasers and other engine components.
Drive smoothly and avoid sudden stops or starts to reduce the stress on the engine.
Faqs
Can I Check My Cam Phasers Myself, Or Do I Need A Professional Mechanic?
Checking cam phasers can be a complex process, and it’s recommended to have a professional mechanic perform the check.
However, with the proper tools and knowledge, it is possible to check them yourself.
How Often Should I Check My Cam Phasers?
It’s recommended to have your cam phasers checked at regular intervals, such as during routine maintenance or when symptoms of failure arise.
What Should I Look For When Checking My Cam Phasers?
When checking cam phasers, you should look for signs of wear or damage, such as scoring or scratches on the surface.
You should also check for proper timing alignment and ensure that the phasers are functioning correctly.
How Do I Use A Timing Light To Check My Cam Phasers?
Attach the timing light to the engine and start the engine.
Shine the timing light on the timing marks and check that they align with the specified position in the owner’s manual.
Conclusion
Checking the cam phasers is an important part of maintaining a vehicle’s engine and preventing major issues down the line.
By following the steps outlined in this guide, including visually inspecting the phasers, checking their timing, and using a dial indicator, vehicle owners can identify potential issues and take steps to address them before they become more severe.
Regular maintenance and good driving habits can help to prolong the lifespan of the engine and prevent issues with the cam phasers.
